
Introduction to Tkinter Label widget
Tkinter Label widget is used to display a text or image on the screen. To use a Label widget, you use the following general syntax:
label = ttk.Label(container, **options)Code language: Python (python)The Label widget has many options that allow you to customize its appearance:
| Options | Meaning |
|---|---|
| anchor | When the text and/or image are smaller than the width, the anchor option determines where to position them tk.W, tk.CENTER or tk.E for left, center, and right alignment respectively. |
| background | Set the background color for the label |
| borderwidth | Add a border around the label. |
| class_ | Specify a custom widget class name for changing the label’s appearance. |
| compound | Specify how to display both text and image on the Label. |
| cursor | Specify the mouse cursor’s appearance when the mouse is over the widget. |
| font | Specify the font style for displaying text |
| foreground | Specify the color of the text |
| image | Specify an image or images to show in addition to text or instead of text. |
| justify | If the text contains newline characters, the justify option specifies how each line is positioned horizontally.The valid values are tk.LEFT (left-justify), tk.CENTER (center), and tk.RIGHT (right-justify). |
| padding | Add more space around the label. |
| relief | Use this option to create an effect for the Label .e.g, flat, raised, sunken, groove, and ridge. |
| style | Specify the custom widget style. |
| takefocus | is a boolean value that specifies whether the label is visited during focus traversal. It defaults to False which doesn’t get focus. |
| text | Specify a string of text to show in the widget |
| textvariable | A StringVar instance that holds the text value of the widget. It overrides the text option if both textvariable and text are available. |
| underline | Specify the position of the letter that should be underlined e.g, underline = 0 would underline the letter E in the text='Exit' |
| width | Specify the number of characters to show |
| wraplength | Chop the text into the lines which less than the length specified by the wraplength option. |
The following shows a skeleton program that we’ll use to illustrate various options of the Label widget:
import tkinter as tk
from tkinter import ttk

root = tk.Tk()
root.geometry('300x200')
root.resizable(False, False)
root.title('Label Widget Demo')

# show the label here

root.mainloop()Code language: Python (python)
Displaying a regular label
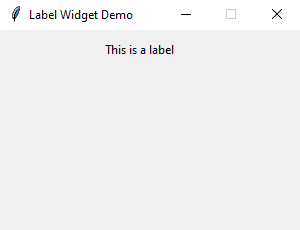
The following program shows how to display a regular label on the root window:
import tkinter as tk
from tkinter.ttk import Label

root = tk.Tk()
root.geometry('300x200')
root.resizable(False, False)
root.title('Label Widget Demo')

# show a label
label = Label(root, text='This is a label')
label.pack(ipadx=10, ipady=10)

root.mainloop()Code language: Python (python)
Output:
How it works.
- First, import
Labelclass from thetkinter.ttkmodule. - Second, create the root window and set its properties including size, resizeable, and title.
- Third, create a new instance of the Label widget, set its container to the root window, and assign a literal string to its
textproperty.
Setting a specific font for the Label
To set a particular font for a label, you pass the font keyword argument to the Label constructor like this:
font = ('font name', font_size)Code language: Python (python)The font keyword argument is a tuple that contains font name and size. For example:
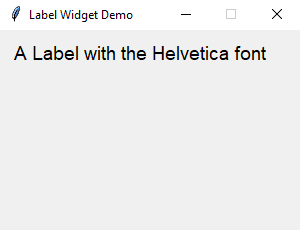
font=("Helvetica", 14)Code language: Python (python)The following example shows a label with the Helvetica font:
import tkinter as tk
from tkinter import ttk


root = tk.Tk()
root.geometry('300x200')
root.resizable(False, False)
root.title('Label Widget Demo')

# label with a specific font
label = ttk.Label(
    root,
    text='A Label with the Helvetica font',
    font=("Helvetica", 14))

label.pack(ipadx=10, ipady=10)

root.mainloop()
Code language: Python (python)
Output:
Displaying an image
To use a Label widget to display an image, you follow these steps:
First, create a PhotoImage widget by passing the path to the photo to the PhotoImage constructor:
photo = tk.PhotoImage(file='./assets/python.png')Code language: Python (python)Second, assign the PhotoImage object to the image option of the Label widget:
Label(..., image=photo)Code language: Python (python)The following example shows how to use a Label widget to display an image:
import tkinter as tk
from tkinter import ttk

# create the root window
root = tk.Tk()
root.geometry('300x200')
root.resizable(False, False)
root.title('Label Widget Image')

# display an image label
photo = tk.PhotoImage(file='./assets/python.png')
image_label = ttk.Label(
    root,
    image=photo,
    padding=5
)
image_label.pack()

root.mainloop()
Code language: Python (python)
Output:
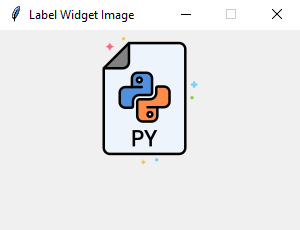
Note that the image file is located at the /assets/ folder.
To display both text and image, you’ll use the text attribute and compound option.
The compound option specifies the position of the image relative to the text. Its valid values are:
| Compound | Effect |
|---|---|
'top' | Display the image above the text. |
'bottom' | Display the image below the text. |
'left' | Display the image to the left of the text. |
'right' | Display the image to the right of the text. |
'none' | Display the image if there’s one, otherwise display the text. The compound option defaults to 'none'. |
'text' | Display the text, not the image |
'image' | Display the image, not the text. |
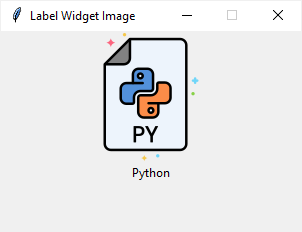
The following program shows how to display both text and image on a label:
import tkinter as tk
from tkinter import ttk

# create the root window
root = tk.Tk()
root.geometry('300x200')
root.resizable(False, False)
root.title('Label Widget Image')

# display an image label
photo = tk.PhotoImage(file='./assets/python.png')
image_label = ttk.Label(
    root,
    image=photo,
    text='Python',
    compound='top'
)
image_label.pack()

root.mainloop()
Code language: PHP (php)
Output:
Summary
- Use the Label widget to display a text or an image or both.